In the post — Running a Private Ethereum Blockchain using Docker, we go over the steps to run an Ethereum network locally on our machine with Docker containers. This post will take a step further by setting up a private blockchain network on the AWS Cloud Computing Services using Terraform, an open-source infrastructure as code software tool.
TL;DR
For those just would like to try the terraform module out, it is available on the public terraform registry here.
Note: Currently the module is still in very early version, it has lots of things to be improved and probably has some issues. If you have any suggestions, want to contribute or want to report any issues, please feel free do so via this Github repository.
Reference
Architecture Overview
The following architecture diagram outlines the main components and their connectivities which forms the private Ethereum network we are provisioning.
Note: For simplification, we do not put all the AWS components created and used to setup the blockchain network here.
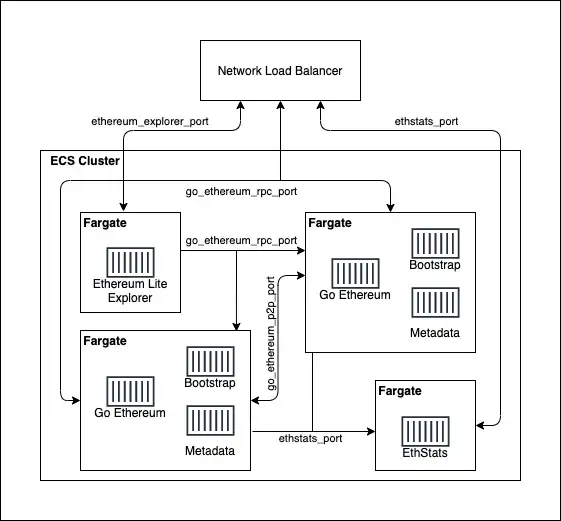
- Network Load Balancer (NLB) — the main entry point to interact with all the services inside the ECS cluster by a DNS name.
- ECS Cluster — the Ethereum nodes and other services are running as containers inside a cluster of the Amazon Elastic Container Service (ECS).
- ECS Services —the cluster consists of 3 types of service. Each service will be running on an AWS Fargate instance. These types of service are defined in the following task definitions.
3.1 Go Ethereum
This task definition is used to run the Go Ethereum (Geth), an Ethereum client software. An ECS service running this task represents one node in the Ethereum network. We can configure the number of nodes to be run when writing the terraform configuration. For example, if we set the number of nodes to be 2, our blockchain network will look like the above diagram.
Inside a task, using this definitions, there are 3 containers — Bootstrap, Metadata and Go Ethereum. The first 2 containers are required for bootstrapping and preparing metadata when the service starts. Then they are terminated leaving only the Go Ethereum container running as an Ethereum node.
Each peer-node connects to other Ethereum nodes via the configured go_ethereum_p2p_port, while the RPC interface is exposed on configurable go_ethereum_rpc_port which can be access from the NLB.
3.2 EthStats
The task for running the web-based Ethereum Network Status dashboard. The dashboard contains statistics, graphs, and metrics received from the online Ethereum nodes in the network. It is accessible via the NLB on the configured ethstats_port.
3.3 Ethereum Explorer
For providing the Etherscan-like block explorer with the Ethereum Lite Explorer that fetches data from the RPC interface of the Ethereum nodes. The block explorer is also accessible through the NLB on the ethereum_explorer_port.
Using the Terraform Module
Now, let’s start building the infrastructure for our blockchain network on AWS using this terraform module — SCB-TechX-Saber-Labs/ecs-private-ethereum-blockchain/aws/0.1.0
Prerequisites
To use the module, here are the basic things to be prepared or installed on the machine.
- Terraform CLI v1.0+
- AWS CLI v2
- An AWS account and its credentials
- An AWS VPC with Subnets in the required AWS Region
- Ethereum Account(s), if you would like to pre-fund the accounts upon initializing the blockchain.
Note: If you are not familiar with terraform, this tutorial for building basic infrastructure on AWS is a good starting point.
The Terraform Configuration
Here are the steps to write a terraform configuration and then apply it for building our own Ethereum network on AWS
- Create a directory to store the terraform configuration files and change into the directory. This is our main working directory.
$ mkdir terraform-private-ethereum && cd terraform-private-ethereum - Create a file with .tf extension. We will define our blockchain network infrastructure by writing the configuration in this file.
$ touch private_ethereum.tf - Open the private_ethereum.tf in a text editor and edit the file content as follows
Note: You must modify the required arguments according to your preferences and your AWS environments. You might also change the optional arguments to suite your needs as well.
					/*
    This is a usage example of the "SCB-TechX-Saber-Labs/ecs-private-ethereum-blockchain/aws" module version "0.1.0".
    The arguments and outputs might be different in the future versions.
*/

# Call the module and set the local name as "private_ethereum" to refer to this instance of the module later.
module "private_ethereum" {

    # Required argument
    # To tell terraform where to download the module's source code when running "terraform init".
    # In this example, the source is terraform's public registry.
    source                  = "SCB-TechX-Saber-Labs/ecs-private-ethereum-blockchain/aws"

    # Optional argument
    # To specify the version of the module, otherwise it uses the latest version.
    version                 = "0.1.0"

    # Required argument
    # To distinguish this provisioning from others as this is used to name the created AWS components.
    network_name            = "devel"

    # Optional argument
    # How many Ethereum nodes to run in the blockchain network, the default is 2 if not specified.
    number_of_nodes         = 2

    # Required argument
    # Specify the AWS region for the provisioned infrastructure.
    region                  = "ap-southeast-1"

    # Required argument
    # The AWS VPC ID for the provisioned infrastructure.
    vpc_id                  = "vpc-0204ec5c6f7ad746e"

    # Required argument
    # The list of AWS subnet to place the Ethereum nodes inside.
    subnet_ids              = [
        "subnet-0d3dd066f35696746",
        "subnet-0233a4b40b131621b",
        "subnet-05580a63c0e79abd2"
    ]

    # Required argument
    # Whether the specified subnets are public subnets or private subnets.
    is_public_subnets       = false

    # Optional argument
    # Specify the mapping of Ethereum address and the amount of ETH for initial allocations.
    # It is convenient to have balance in accounts for testing purpose.
    # The addess with public key and private key can be generated from https://iancoleman.io/bip39/
    # Write down the private key as it is required to access the balance in the account.
    initial_eth_allocations = {
        "0xB5F39800302430c4410ce3F040ac00E1D6cA0CD2": "10",
        "0x66c0874A273b43aB9967C1474360457e2C910949": "5",
    }

    # The following are optional arguments for port numbers to exposing services.
    # No need to specify, if there is no change required.
    go_ethereum_p2p_port       = 21000
    go_ethereum_rpc_port       = 22000
    ethstats_port              = 3000
    ethereum_explorer_port     = 80

    # The following are optional arguments for the docker images used to run services' container in the module.
    # The default values are the images from docker hub.
    # You might need to modify them to use your own image registry, in case of the docker hub rate limit is reached.
    go_ethereum_docker_image             = "ethereum/client-go:alltools-v1.10.8"
    aws_cli_docker_image                 = "amazon/aws-cli"
    ethstats_docker_image                = "puppeth/ethstats:latest"
    ethereum_lite_explorer_docker_image  = "alethio/ethereum-lite-explorer:v1.0.0-beta.10"
}

# The Ethereum "chain ID" of the provisioned blockchain network.
output "chain_id" {
     value = module.private_ethereum.chain_id
}

# The ECS cluster name created for running the services' container.
output "ecs_cluster_name" {
     value = module.private_ethereum.ecs_cluster_name
}

# The DNS of Network Load Balancer for exposing the services.
output "nlb_dns" {
     value = module.private_ethereum.nlb_dns
}

# The HTTP endpoint to access the Ethereum block explorer.
output "ethereum_explorer_endpoint" {
     value = module.private_ethereum.ethereum_explorer_endpoint
}

# The HTTP endpoint to access the Ethereum Network Statistics dashboard.
output "ethstats_endpoint" {
     value = module.private_ethereum.ethstats_endpoint
}

# The HTTP endpoint for Go Ethereum's RPC APIs.
output "geth_rpc_endpoint" {
     value = module.private_ethereum.geth_rpc_endpoint
}

# The overall status output from the module.
output "status" {
    value = module.private_ethereum._status
}
4. Before applying terraform configuration, we must initialize the configuration directory to download the module and its dependencies by running terraform init.
					$ terraform init
Initializing modules...
Downloading SCB-TechX-Saber-Labs/ecs-private-ethereum-blockchain/aws for private_ethereum...
- private_ethereum in .terraform/modules/private_ethereum
Initializing the backend...
Initializing provider plugins...
- Finding hashicorp/aws versions matching "~> 3.57"...
- Finding hashicorp/local versions matching "~> 2.1"...
- Finding hashicorp/random versions matching "~> 3.1"...
- Installing hashicorp/local v2.1.0...
- Installed hashicorp/local v2.1.0 (signed by HashiCorp)
- Installing hashicorp/random v3.1.0...
- Installed hashicorp/random v3.1.0 (signed by HashiCorp)
- Installing hashicorp/aws v3.58.0...
- Installed hashicorp/aws v3.58.0 (signed by HashiCorp)
Terraform has created a lock file .terraform.lock.hcl to record the provider
selections it made above. Include this file in your version control repository
so that Terraform can guarantee to make the same selections by default when
you run "terraform init" in the future.
Terraform has been successfully initialized!
5. After the initialization succeeds, we can then start build the infrastructure by running terraform apply, then type yes when there is a prompt for confirmation.
					$ terraform apply
Terraform used the selected providers to generate the following execution plan. Resource actions are indicated with the following symbols:
  + create
 <= read (data resources)
...
truncated to save some space here
...
Plan: 28 to add, 0 to change, 0 to destroy.
Changes to Outputs:
  + chain_id                   = (known after apply)
  + ecs_cluster_name           = "ethereum-network-devel"
  + ethereum_explorer_endpoint = (known after apply)
  + ethstats_endpoint          = (known after apply)
  + geth_rpc_endpoint          = (known after apply)
  + nlb_dns                    = (known after apply)
  + status                     = (known after apply)
Do you want to perform these actions?
  Terraform will perform the actions described above.
  Only 'yes' will be accepted to approve.
Enter a value:yes
6. If things go well, we should see the following outputs when it finishes running. Please note down the outputs as we are going to use them to interact with our blockchain later.
					...
truncated to save some space here
...
Apply complete! Resources: 28 added, 0 changed, 0 destroyed.
Outputs:
chain_id = 8495
ecs_cluster_name = "ethereum-network-devel"
ethereum_explorer_endpoint = "http://nlb-ethereum-network-devel-11fb3dec23528df3.elb.ap-southeast-1.amazonaws.com:80"
ethstats_endpoint = "http://nlb-ethereum-network-devel-11fb3dec23528df3.elb.ap-southeast-1.amazonaws.com:3000"
geth_rpc_endpoint = "http://nlb-ethereum-network-devel-11fb3dec23528df3.elb.ap-southeast-1.amazonaws.com:22000"
nlb_dns = "nlb-ethereum-network-devel-11fb3dec23528df3.elb.ap-southeast-1.amazonaws.com"
status = <<EOT
Completed!
Network Name                          = devel
Number of Ethereum Nodes              = 2
Geth Task Revision                    = 1
Ethstats Task Revision                = 1
Ethereum Lite Explorer Task Revision  = 1
S3 Bucket Name                        = ap-southeast-1-ecs-devel-85acef591cfefe92
CloudWatch Log Group                  = /ecs/go-ethereum/devel
EOT
Interacting with the Private Ethereum Network
After everything is up and running, let’s test our blockchain by sending a transaction and see if it works.
While we can also use curl command to interact with the RPC endpoint similar to the prior post, this time, we opt for a more convenient way by using MetaMask, a widely-use crypto wallet software. It is easy to install on various browser as an extension by following the instructions here.
- Before sending a transaction, we have to connect MetaMask to our private Ethereum network by adding a custom network RPC and supply the settings as follows.
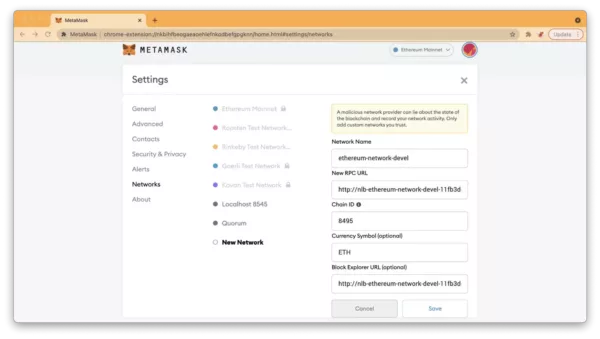
- Network Name — the label of this network in MetaMask.
- New RPC URL — the RPC interface endpoint of a node in the network. We fill the geth_rpc_endpoint from the outputs of terraform here.
- Chain ID — the identifier of our Ethereum blockchain, we use the value from chain_id output here.
- Currency Symbol — the symbol of native currency for the blockchain network, as our network is a private Ethereum, so it is ETH.
- Block Explorer URL — the URL of web-based blockchain explorer that MetaMask points to for showing the transaction details. We take the value of ethereum_explorer_endpoint from the outputs to fill here.
2. Next, we will import the accounts using the private keys into MetaMask.
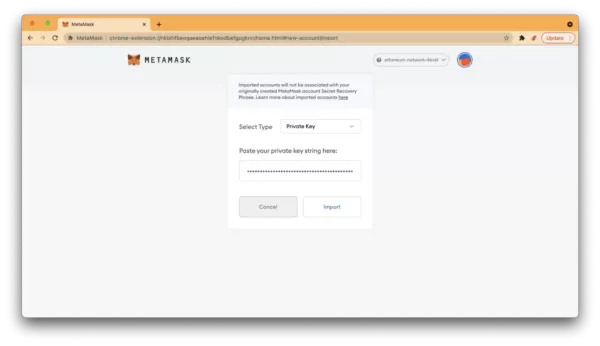
3. The 2 accounts (labeled as Account 3 and Account 4) imported here are the accounts which we put their addresses in the initial_eth_allocations argument when configuring the module. Therefore, there is ETH balance pre-filled with the same amounts (10 ETH and 5 ETH) as the values we supplied for the argument.
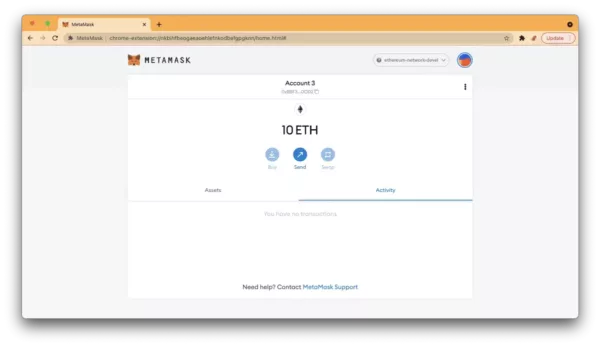
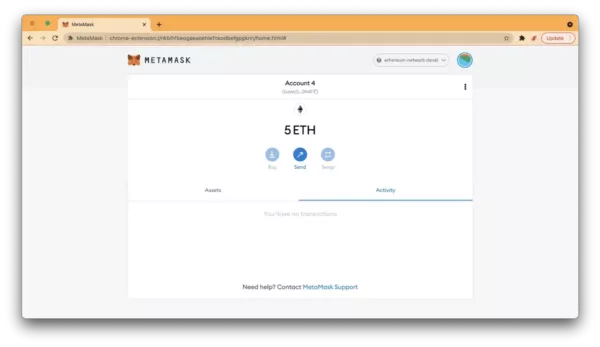
4. Now, we are going to send transaction by transfer 3 ETH from Account 3 to Account 4 by clicking Send button from the Account 3 and fill in an ETH amount, the address of Account 4 and the gas fee for the transaction.
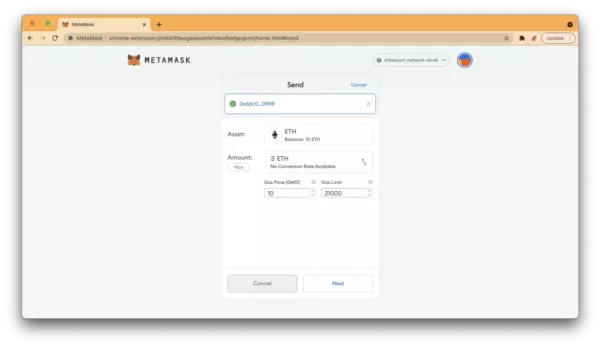
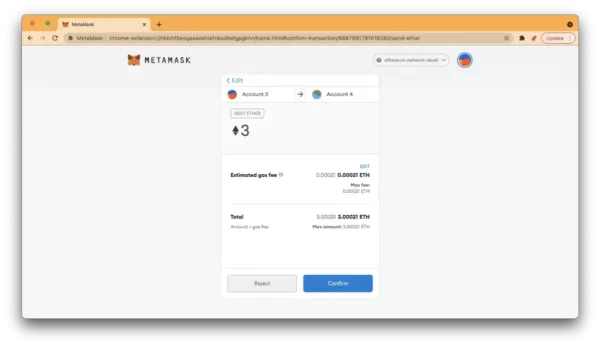
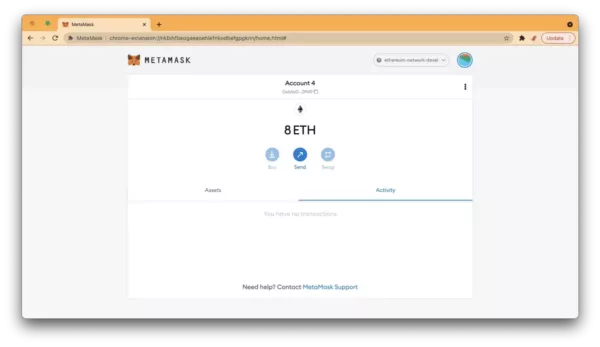
5. When the transaction processed successfully, the balance in Account 4 is increased by 3 ETH while the 3 ETH + an amount of gas fee is deducted from Account 3.
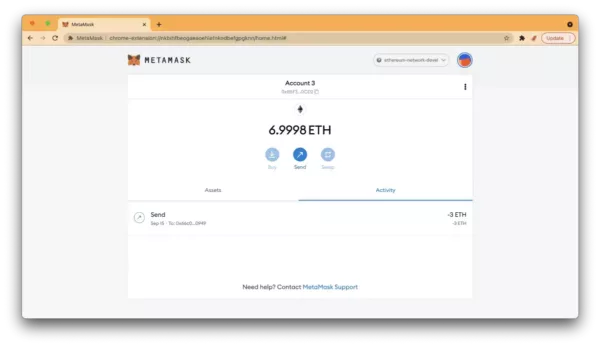
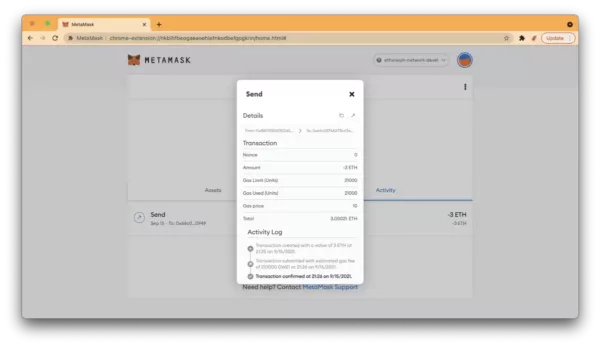
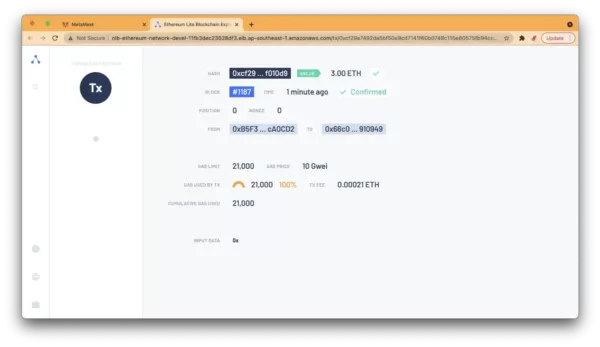
6. We can explore the details of the transaction by selecting it under Activity tab and clicking the activity log entry. This will open the Ethereum Lite Explorer for us to see the details of the selected transaction.
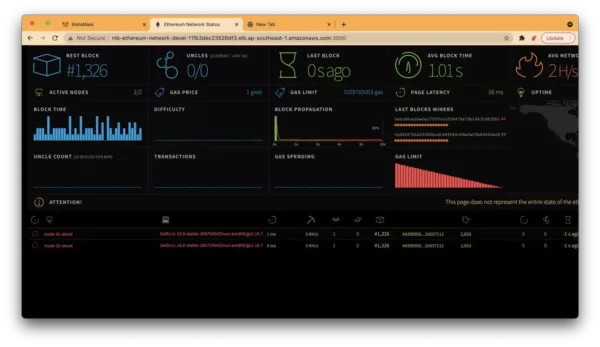
7. Also, we can open the ethstats_endpoint with a browser to check some statistics and metrics of our private network and its nodes as the following example.
Lastly, to save our AWS bills, we might want to tear down our blockchain network after we are done with our experiments. To do this, we run terraform destroy and type in yes when it prompts for confirmation.
Caution! All data and transactions on the blockchain will be WIPE OUT as we do not store the data on any persistent storage.
					...
truncated to save some space here
...
module.private_ethereum.aws_lb.nlb_ethereum: Still destroying... [id=arn:aws:elasticloadbalancing:ap-southea...thereum-network-devel/11fb3dec23528df3, 10s elapsed]
module.private_ethereum.aws_lb.nlb_ethereum: Still destroying... [id=arn:aws:elasticloadbalancing:ap-southea...thereum-network-devel/11fb3dec23528df3, 20s elapsed]
module.private_ethereum.aws_lb.nlb_ethereum: Still destroying... [id=arn:aws:elasticloadbalancing:ap-southea...thereum-network-devel/11fb3dec23528df3, 30s elapsed]
module.private_ethereum.aws_lb.nlb_ethereum: Still destroying... [id=arn:aws:elasticloadbalancing:ap-southea...thereum-network-devel/11fb3dec23528df3, 40s elapsed]
module.private_ethereum.aws_lb.nlb_ethereum: Destruction complete after 46s
Destroy complete! Resources: 28 destroyed.


